Dimensioning Features Of Size
Features of Size should be located by basic dimensions. The size should be specified with coordinate dimensions, and the tolerance for location should be specified with Tolerance of position.
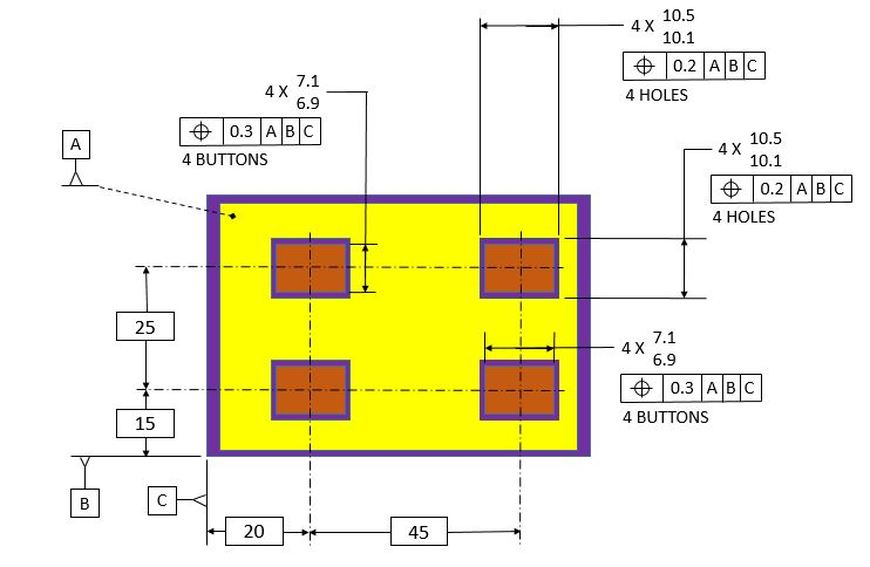
Below is an example of how to dimension features of size. In this case, we have an assembly that includes buttons and a cover. The buttons and the holes in the cover are all dimensioned relative to the same datums. Those datums apply to the assembly itself, so anything within the assembly can be located to those datums.
The holes and the buttons are patterns, so in each case we can show the tolerance once and use the 4X to indicate that the dimension applies in all four places. For clarity, we add a note under each tolerance to state explicitly whether it applies to holes or buttons.
We can now do tolerance stacks to verify that we have sufficient gaps between the buttons and the holes. Since the buttons and the holes are located by the same basic dimensions, and since they are toleranced back to the same datums, are stack paths are short.
We can do a separate stack in the vertical direction and the horizontal direction as shown below.
Since the buttons and holes are dimensioned as patterns, we need stack only one hole/button. The clearance from the one will be the same for all of them.
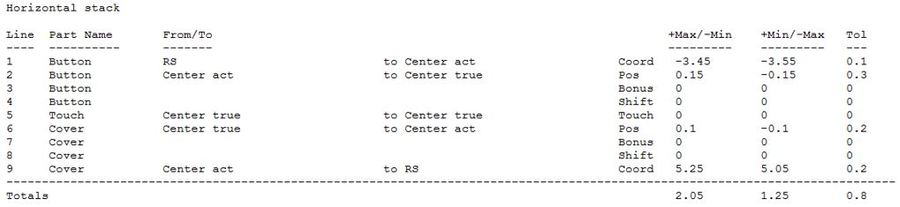
First for the horizontal stack:
The steps in the stack path are shown. The stack starts at the right side of the button, moves to the theoretically perfect location of the center of the button and the center of the hole, and then back to the right side of the hole.
Here is the actual stack for the horizontal direction:
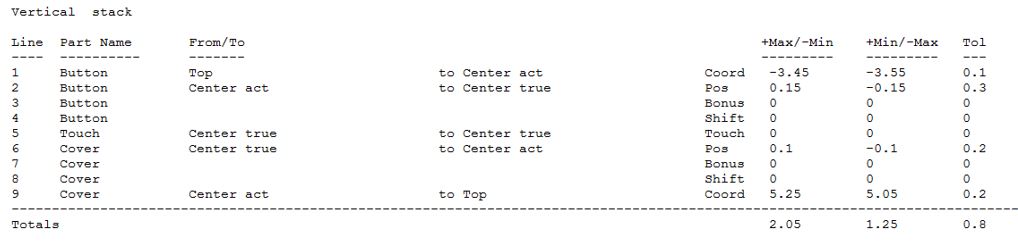
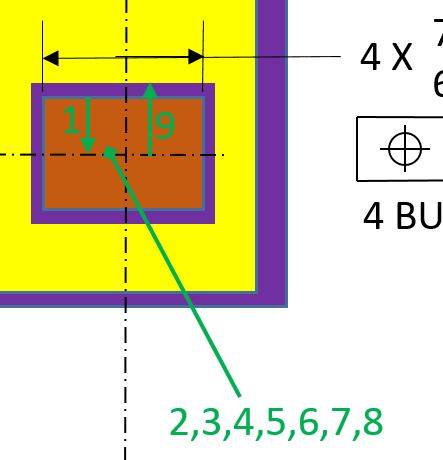
And now the vertical stack:
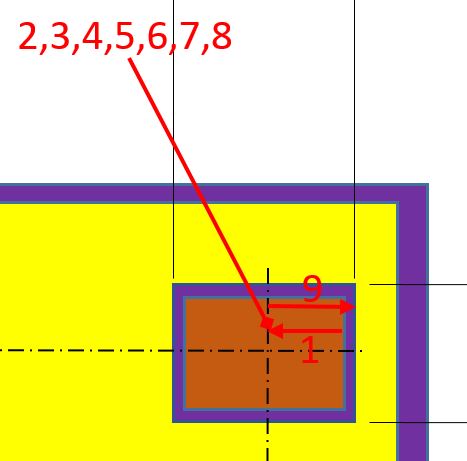
The steps in the stack path are shown. The stack starts at the top of the button, moves to the theoretically perfect location of the center of the button and the center of the hole, and then back to the top of the hole.
Here is the actual stack for the vertical direction: